This lab looks at the PeeringDB and the Internet Routing Registry to demonstrate some of the daily operational requirements for network operators.
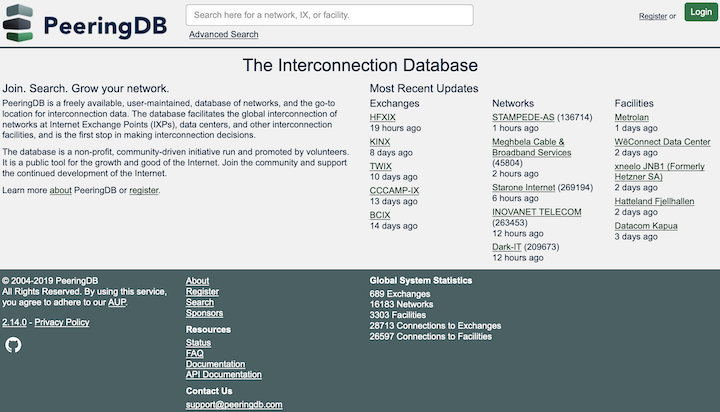
As discussed in the presentation, the PeeringDB is an important global repository listing all network operators and content providers, and the interconnect locations they are present at. It is very useful for network operators and content providers to indicate location and capacity availability to potential peers.
This lab exercise is a “paper” exercise. We are going to create paper PeeringDB entry for our group’s network, presence, and peering.
Complete the details in the following table - use your notepad or a document on your laptop:
| Heading | Details to be recorded in lab peeringDB entry |
|---|---|
| Organisation Name | |
| Network Type | |
| Primary ASN | |
| Technical Contact Email | |
| Number of IPv4 Prefixes | |
| Number of IPv6 Prefixes | |
| Protocols Supported | |
| Locations Present at |
The Exchange Point is known as NSRC-LAB-IX and lives inside AS65534
Once completed show the instructors what your PeeringDB entry might look like. (It is not possible to use the public PeeringDB - this exercise is more to show what sort of information would normally be listed for public consumption so that other network operators could know how to peer with you.)
Once the paper PeeringDB entry has been created, participants from network operators with existing public AS numbers and no PeeringDB entry should now work to create one for their network.
Make a list of all the locations present at, the address space in use, the AS number in question, and typical traffic levels (Mbps, Gbps, Tbps etc), in preparation for creating a peeringDB entry. Complete the following table:
| Heading | Details to be recorded in public peeringDB entry |
|---|---|
| Organisation Name | |
| Long Name | |
| City | |
| Country | |
| Website | |
| Primary ASN | |
| IRR Record (AS-Set) | |
| Technical Contact Email | |
| Technical Contact Phone | |
| Network Type | |
| Number of IPv4 Prefixes | |
| Number of IPv6 Prefixes | |
| Traffic Levels | |
| Traffic Ratios | |
| Geographic Scope | |
| Protocols Supported | |
| Any Notes | |
| List of locations present at |
Once you have gathered all this information, go to www.peeringdb.com.
First you need to create an account for your organisation. Click on the Register button to get a page looking like the following:
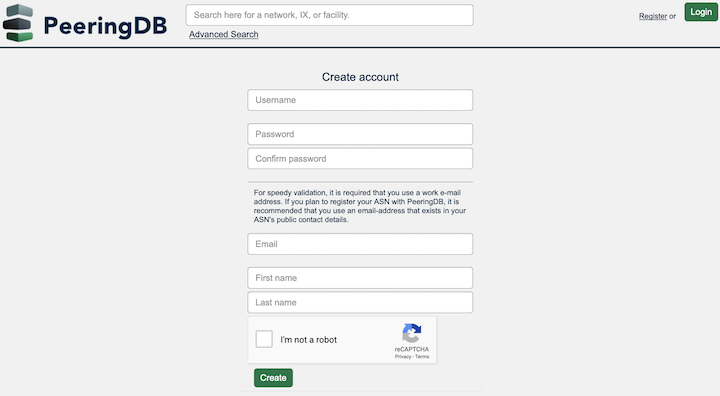
Fill in your details, and the Captcha, then click on Create to create your account.
Once you create your account, the PeeringDB system will send an email to the supplied email address to verify the account set up. After that, you will be presented with the following screen:
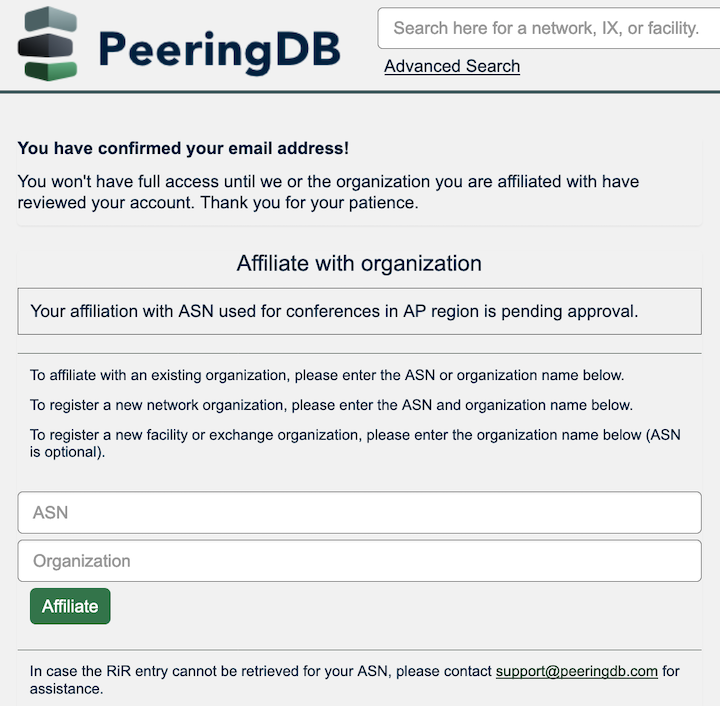
This screen requests you to affiliate yourself with your organisation. Enter your AS number and your organisation name as held in your Regional Internet Registry database entry for your AS. To find out what your AS name is, run:
whois -h jwhois.apnic.net AS<number>You will see something like this for ARIN registrations:
ASNumber:       3582
ASName:         UONET
ASHandle:       AS3582
RegDate:        1994-05-11
Updated:        2019-04-11
Ref:            https://rdap.arin.net/registry/autnum/3582

OrgName:        University of Oregon
OrgId:          UNIVER-193
Address:        UO Information Services
and something like this for RIPE NCC, LACNIC, AfriNIC and APNIC registrations:
aut-num:        AS4777
as-name:        APNIC-NSPIXP2-AS
descr:          Asia Pacific Network Information Centre
descr:          AS for NSPIXP2, Remote facilities site.
country:        JP
Use the as-name / ASName entry to complete your form - and include your ASN as well.
Over the next few days, PeeringDB staff will verify your registration entry for your AS number1, and verify that you can link your PeeringDB account to your organisation’s AS number. You will get an email response looking like this:
Your affiliation request to the Organization 'XXXXX' and it's entities has been approved.

This was the result of a manual review of your affiliation request to ASN XXXXX.

You may view and edit your organization at https://peeringdb.com/org/XXXXX.

If you have questions, please don't hesitate to contact peeringdb support at support@peeringdb.com.
Once you receive this approval, log out of your PeeringDB account, and then log back in again. Click on the menu on the top right, for example like this:

The drop down menu will list the AS names that the account is associated with. Click on your AS name, and then proceed to complete the page shown - it will look like this:
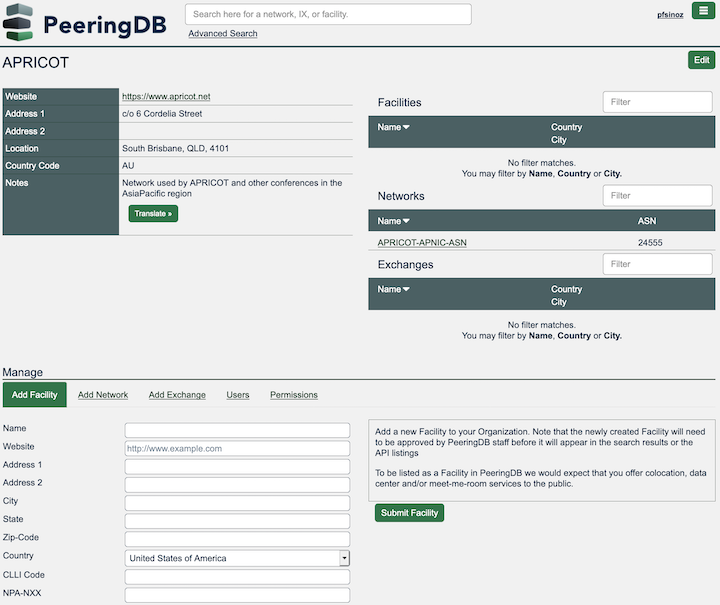
Fill up the details to suit your network and who it connects to. If you are able to do this during the workshop week, then ask the instructors for help if you get stuck.
You are now set. Your network will be visible to all other PeeringDB members, and potential peers will see which interconnect facilities your network is present at. Please remember to keep the details up to date - it is to your advantage to do so.
PeeringDB is a valuable industry best practice tool, provided by the community for the community. It’s features are designed to help operators of Autonomous Networks decide whether to interconnect with each other, and provide more generic information about a network’s capability.
As discussed in the presentation, the Internet Routing Registry (IRR) is not as widely used as it should be. But it is a requirement from several transit providers to have the correct information recorded in the IRR before they will accept prefixes from their customers.
This series of “paper” exercises is going to create the three essential IRR entries needed for network operators on today’s Internet.
This lab exercise is going to create a Route Object for each Group’s IPv4 and IPv6 address space. Using a text file on your laptop, create a Route Object using the format in the text box below (as usual, replace X with your Group number):
route:          100.68.X.0/24
descr:          GROUPX-Block
country:        ZZ
notify:         your.email@internet
mnt-by:         MAINT-ZZ-ISP
origin:         ASX0
last-modified:  YEAR-MN-DY
source:         RIR
This Route Object states that the route 100.68.X.0/24 will be originated by ASX0 - these are the key components of a Route Object.
Inserting the Country tells geolocation providers which country this address space will be used in. It is a good idea to include this so that any end-users using this address space will appear to be from the country they are located in (and so services such as Google “get the right language” or content for the end-user).
The mnt-by entry MAINT-ZZ-ISP is created when the IRR account is set up - and is referred to for any updates to the object. It provides the security for the object, with changes to it only being permitted with reference to this Maintainer. Details of how these are done can be found on the specific IRR hosting organisation website (whether it is RIR member portal or RADB etc).
Once you have created this Route Object, show it to the lab instructors.
This lab exercise creates an AS Set for the Group. The AS Set is used to group the autonomous systems announced by the network operator to its peers. It is a convenient form to allow the network operator to add autonomous systems it is announcing simply by updating its AS Set.
Using a text file on your laptop, create an AS Set using the format in the text box below.
as-set:         AS-GROUPX
descr:          Group X transit networks
members:        ASX0
admin-c:        GRPX-ADM
tech-c:         GRPX-TECH
notify:         techs@groupX
mnt-by:         MAINT-ZZ-ISP
last-modified:  YEAR-MN-DY
source:         RIR
Note there is only one member of the AS Set for now. But in future, if we need to add more customer AS numbers to our announcements to our peers and upstreams, we can update the list of members to include the new ASes. This helps network operators scale their published policy.
The AS Set is used in the AS Object to document what the autonomous system’s routing policy is with its adjacent connected networks.
Once completed, show the lab instructors the as-set object you have created for your group.
This lab exercise creates an AS Object for the Group. The AS Object is used to document the peering policy between the local AS and its directly connected ASes.
Using a text file on your laptop, create an AS Object using the format in the text box below (as usual, replace X with your Group number). Remember that Groups 1 to 3 use AS121 for transit, and Groups 4 to 6 use AS122 for transit - so set the Y in the import and export statements appropriately.
Note that you will need to create import and export entries for all the other Groups in the lab, both for the private peering (which local-preference to use?) and the IXP peering (which local-preference to use?). We will use the AS Set we created earlier. The form below uses GroupA to refer to the other 5 groups in the lab network.
aut-num:        ASX0
as-name:        GROUPX-AS
descr:          NSRC Routing Security Workshop
country:        XX
import:         from AS12Y      action pref=50;     accept ANY
export:         to AS12Y        announce AS-GROUPX
import:         from ASGroupA   action pref=200;     accept ASGroupA
export:         to ASGroupA     announce AS-GROUPX
...etc...
admin-c:        GRPX-ADM
tech-c:         GRPX-TECH
notify:         techs@groupX
mnt-by:         MAINT-ZZ-ISP
last-modified:  YEAR-MN-DY
source:         RIR
The format will vary depending on which IRR database the object is required for, but the above does show the generic version.
Once completed, show the lab instructors the autnum object you have created for your group.
For those participants who have an ASN for their existing operational network, yet have no Route Objects, or AS-Sets or AS Objects set up, now is a good time to create one based on the lab work done above. Use your favourite RIR portal to create these objects - ask the workshop instructors if you need assistance.
Note: This lab isn’t intended to teach the details of how to configure and use RPSL, but to show their typical format and how they would be needed to help secure the global routing system.
It is unlikely that this will happen during this lab, but if verification comes back during this workshop, then please inform the instructor and they will guide you for the next steps.↩