In this lab you’ll set up your access to a cloud provider (Amazon Web Services) and create some resources.
You will be working in pairs or groups of three.
If you get stuck for any reason, or things aren’t working how you expect, please ask an instructor for help.
Everyone in the group should do this section. You will each create your own personal login accounts.
Use your web browser to connect to the AWS console at https://nsrc-training.signin.aws.amazon.com/console (or a different URL given by your instructors).
Login using the user name and password given by your instructors.
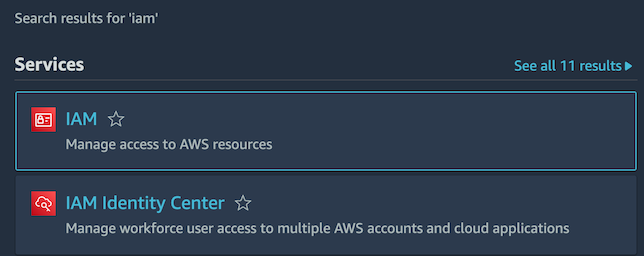
After your have logged in, find the search box next to “Services” at the top-left corner. Enter “IAM” into this box, and then click on “IAM” (subtitled “Manage access to AWS resources”).
This should take you to the IAM Dashboard.
On the left side, under Access Management, click Users. This should display a list of users. At the top right, click the button “Create User”.

Create a new user account for yourself to use.

For now, select “I want to create an IAM user” - this is the simpler approach. (We’ll discuss Identity Center, which used to be called Amazon Single Sign-On, later)
Once you’ve selected this, you’ll be offered a choice to auto-generate a password, or to enter your own. You can choose either, but make sure you remember the chosen password.
Please select “Users must create a new password at next sign-in”. This is best practice, especially if you were giving a password to someone else so they could choose their own secret password. It also allows them the ability to change their password in future.
Click on Next.
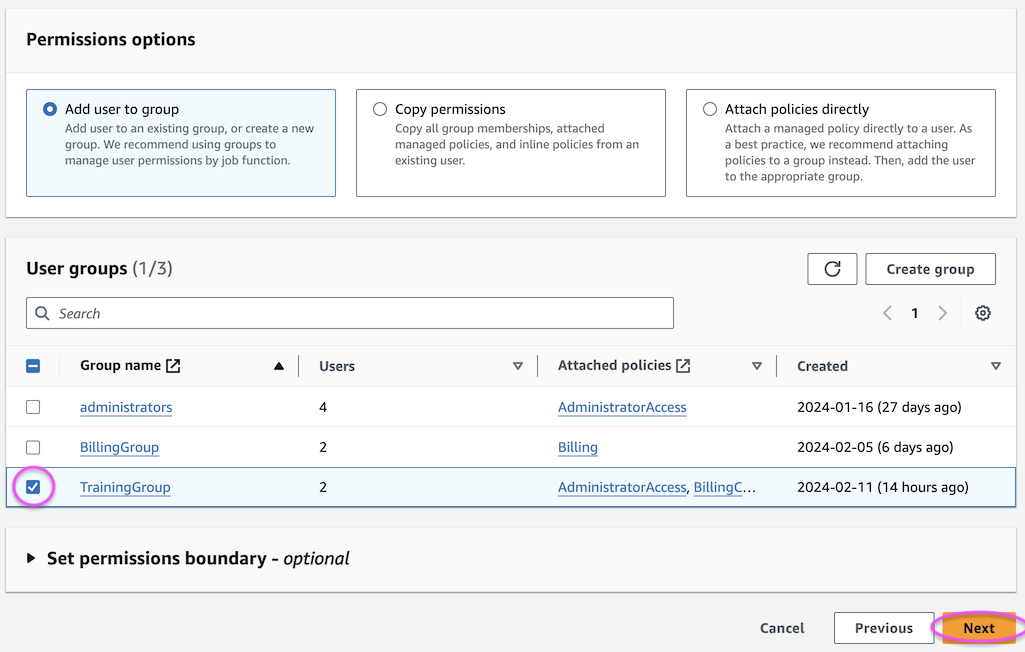
On this page, select “Add user to group” and check the “TrainingGroup” group, then click Next. (This group is set up to give you full admin access to the account, including read access to charging data)
You will then get a summary page, which shows two permissions:
Click on “Create user”, and you should get a green box saying “User created successfully”. Below this, click on the “Show” button next to Console password, if you have autogenerated it.
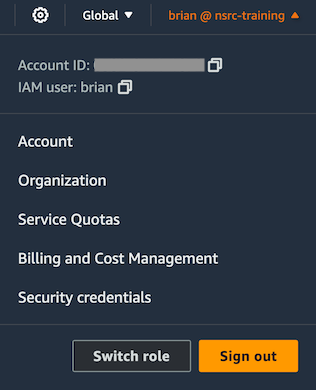
On the very top-right of the screen, click on your username @ account name, and then click “Sign out”.
Then click “Log back in”, or just use the URL shown earlier.
At this point, as long as you selected “create a new password at next sign-in”, you will be prompted to choose a new password. Enter the old one, then the new password twice.
You should be back in the AWS console.
Make sure you remember your new password! You will use this login for the rest of the workshop; the original admin login you used will be disabled by the instructors after this session
Since your new account is an administrator, which can create, edit or delete everything in the account, it’s very important that you secure it using multi-factor authentication.
On the very top-right of the screen, click on your username @ account name, and select “Security credentials”.
Click on “Assign MFA” (or “Assign MFA device” lower down). After you have done this, you will see the following screen:
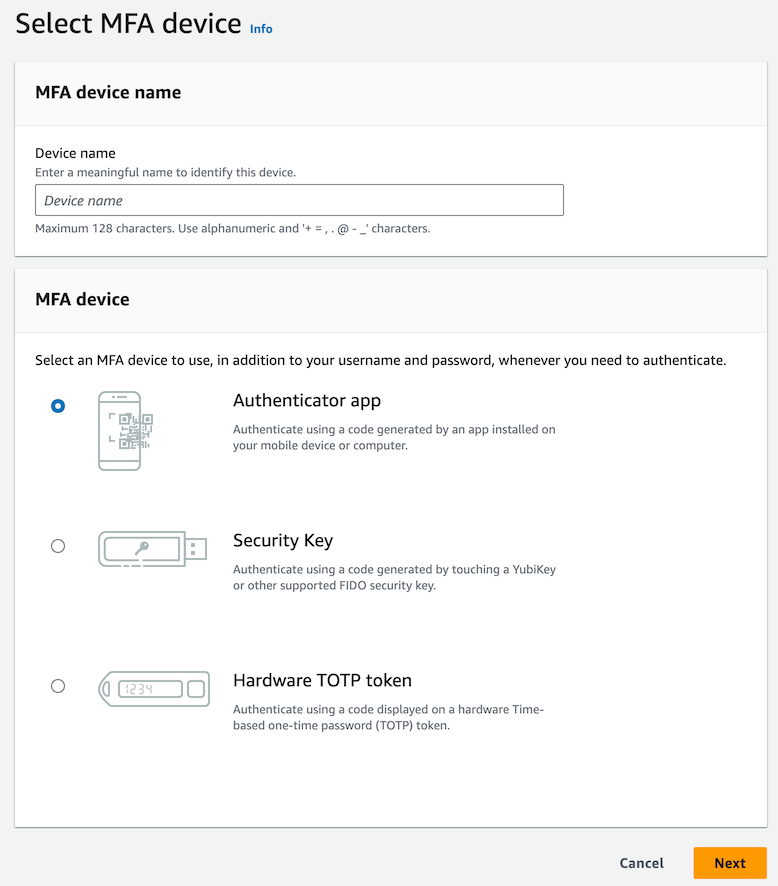
Enter a device name, like “iphone” (spaces are not allowed, but dashes and underscores are), then click Next.
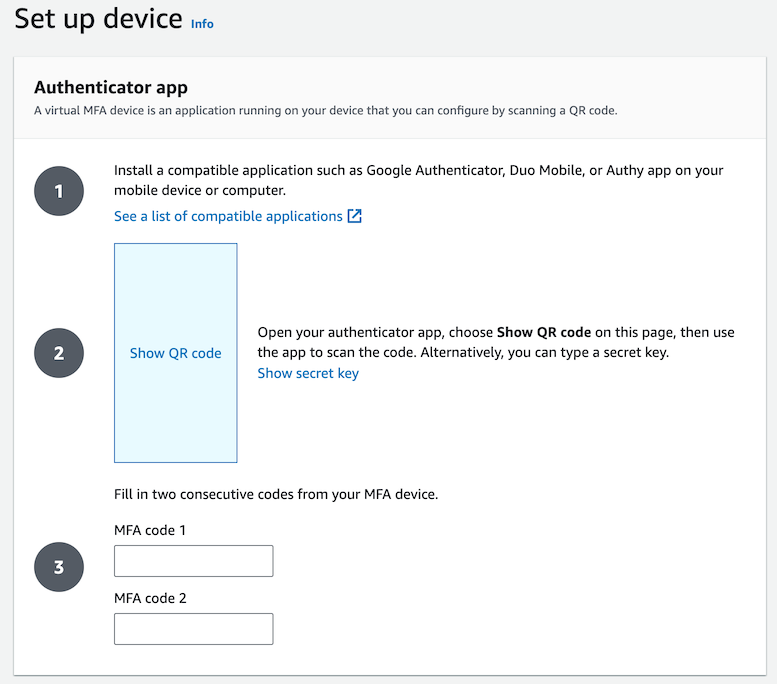
Install an authenticator app on your phone, such as “Google Authenticator”. This needs to be an app which supports Time-based One Time Passwords (TOTP). Talk to the instructors if you’re not sure which app to install.
Click on the blue square that says “Show QR code”.
In the authenticator app, click “+” to add account, then scan the QR code with your camera. The app should show a new 6-digit code every 30 seconds. Enter one of these codes into “MFA code 1”, and then when it changes, enter the next code into “MFA code 2”, then click “Add MFA”.
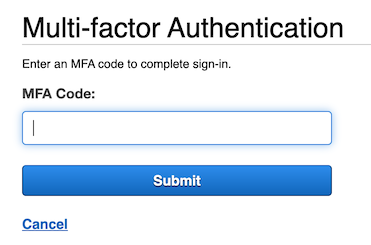
Now logout, and login again. After entering your username and password, you should be prompted for an MFA code:
You will only create ONE EC2 instance in your group
For this part, choose ONE person in your group to do these steps on their laptop, while the others watch and discuss.
You are going to create a virtual machine, called an EC2 Instance (EC2 = Elastic Compute Cloud)
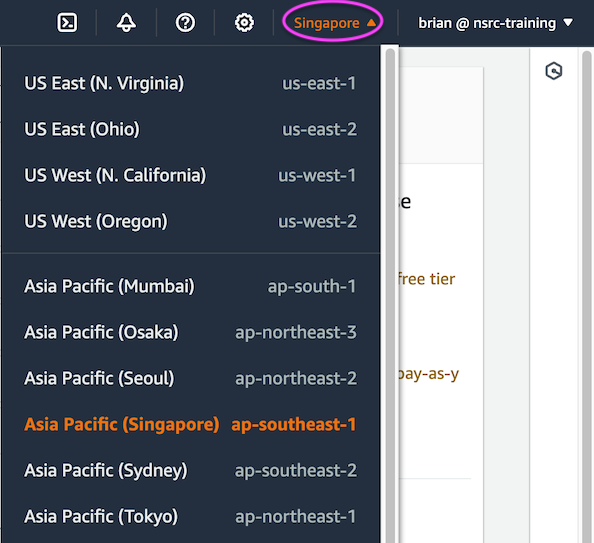
On the menu bar, at the top right near your username, check that the region selected says “Singapore”. If not, click on it and select “Asia Pacific (Singapore) ap-southeast-1” - or another region if your instructors tell you to do so.
In the top left, next to “Services”, enter “EC2” into the search box, and then click on “EC2 - Virtual Servers in the Cloud”
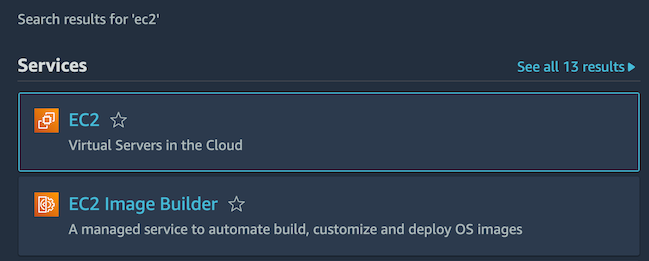
This should take you to the EC2 Dashboard.
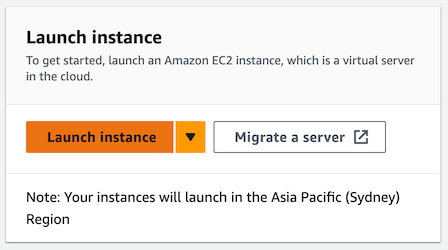
Click on “Launch Instance”.
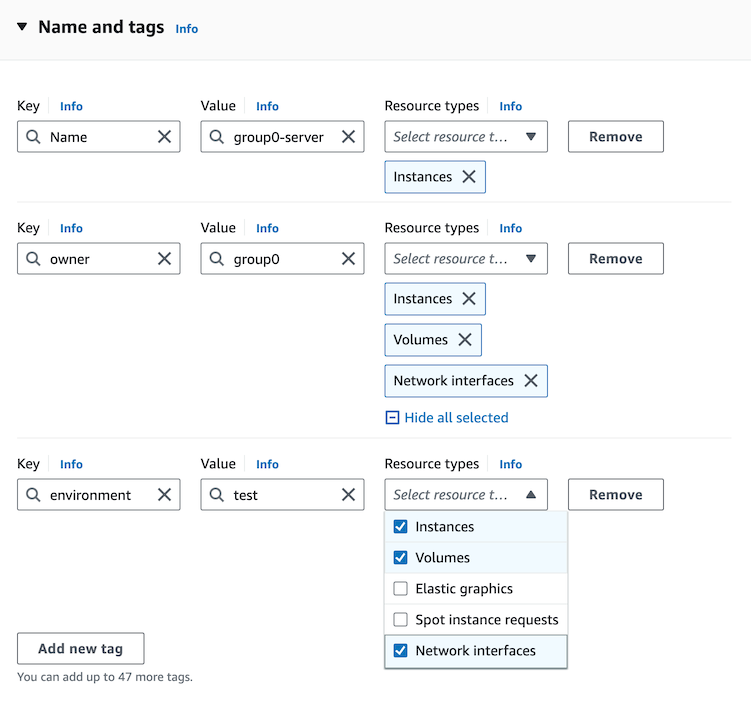
Under “Name and tags”, enter a name for your VM. We suggest you call it “groupX-server” where X is the group number assigned by your instructors.
You need to remember this name, to find your instance later.
To the right of the name, click “Add additional tags”. You can see that the instance name you’ve chosen is actually a tag, whose key is “Name”.
Next you’re going to add two more tags to help with cost management.
Click “Add new tag” again. This time for the key enter “environment”, and for the value enter “test”. Under Resource types, again check Instances, Volumes and Network Interfaces.
Now move to the next section, “Application and OS Images”, and click on “Ubuntu”.
On the drop-down menu under “Amazon Machine Image (AMI)”, select “Ubuntu Server 22.04 LTS (HVM), SSD Volume Type” if it’s not already selected.
Ensure that architecture is “64-bit (x86)”

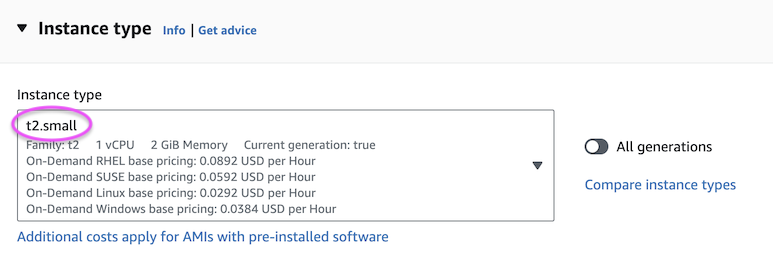
Under “Instance type” select “t2.small”. This is a small instance with 1 vCPU and 2 GiB of memory. (The default of “t2.micro” does not have enough RAM for the later exercises, so make sure you change it).
Under “Key pair (login)”: if you had already uploaded an SSH public key then you could select it here. However, for this exercise you should select “Create new key pair”.
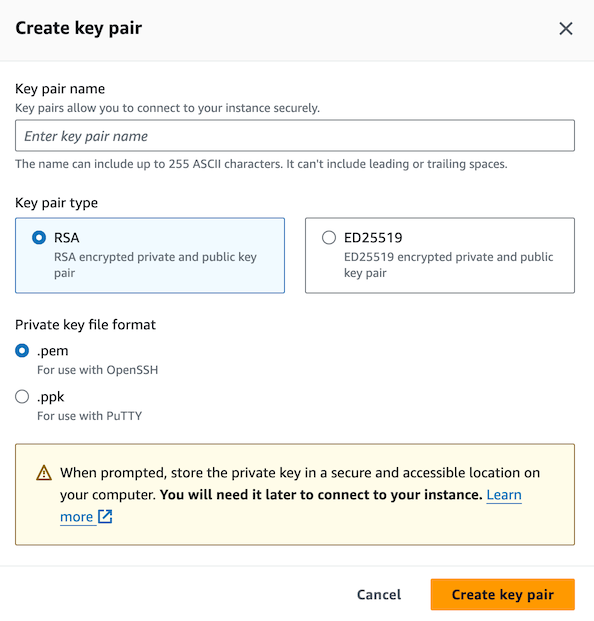
Enter a name like “groupX key” (replace X with your group number), select ED25519 (these keys are smaller and faster), and format “.pem for OpenSSH”. Click Create key pair.
The private key file will be downloaded to the laptop of the person who is doing the exercise. The private key is not stored in the cloud, and cannot be retrieved if lost. Normally it should be kept safely, but for the purposes of this lab, we will not need it.
Under “Network settings”, you should find that “Create security group” is already selected. Check “Allow SSH traffic from anywhere”, “Allow HTTPS traffic from the internet”, “Allow HTTP traffic for the internet”.

A security group (a list of firewall rules) that allows the selected traffic to your instance will be created automatically, but unfortunately in this simple view you cannot select its name - and it can’t be renamed later.
So now click the “Edit” button to the right at the top of the Network Settings block.

The screen will change to something like this:
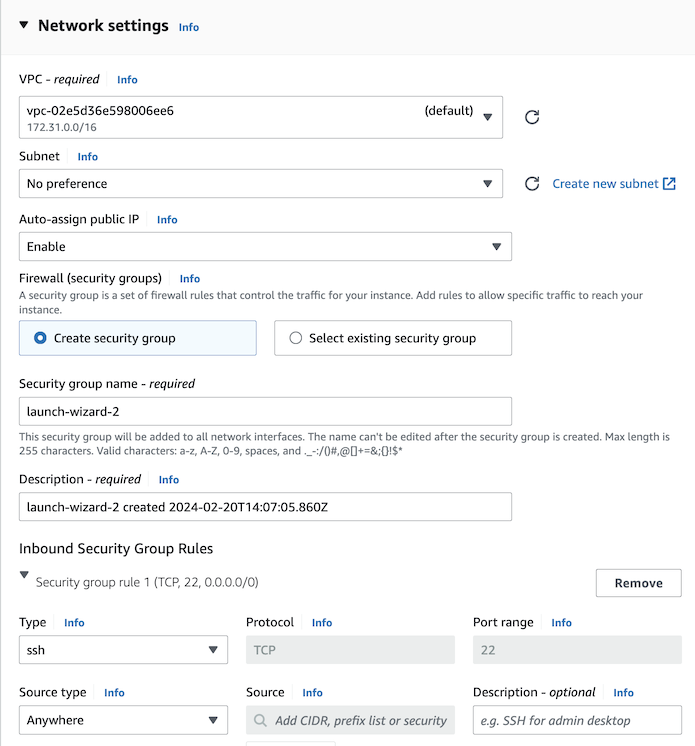
Change the name of your security group to “groupX-webserver”, replacing X with your group number. You should also change the description to say “allow inbound web traffic”.
Make sure that you can see rules that allow HTTPS and HTTP from anywhere:
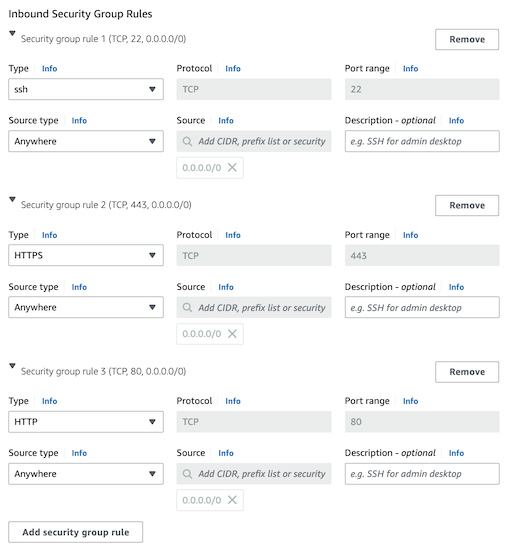
If these are missing then add them by hand:
- Click “Add security group”
- Select Type: HTTPS; Source type: Anywhere
- Click “Add security group” again
- Select Type: HTTP; Source type: Anywhere
Now look at the “Configure storage” section. Leave it set to 1 x 8 GiB, gp2 (gp2 is the storage class, for an EBS volume with general purpose SSD)
Then on the right-hand side, under Summary, click “Launch instance”
You will see a progress bar for a few seconds, and then “Success” with your instance ID.
On the top left, click the hamburger icon if necessary to open the side menu, then under “Instances” click “Instances”. You should see your instance listed amongst those created by other groups.
You’re now going to login to the instance. There are several methods, including using an SSH client on your local machine with the private key previously generated. But for simplicity, you’re going to use “EC2 Instance Connect” via the AWS console interface, which uses its own keys.

In the next page, the defaults should be correct (“Connect using EC2 Instance Connect”, username “ubuntu”)
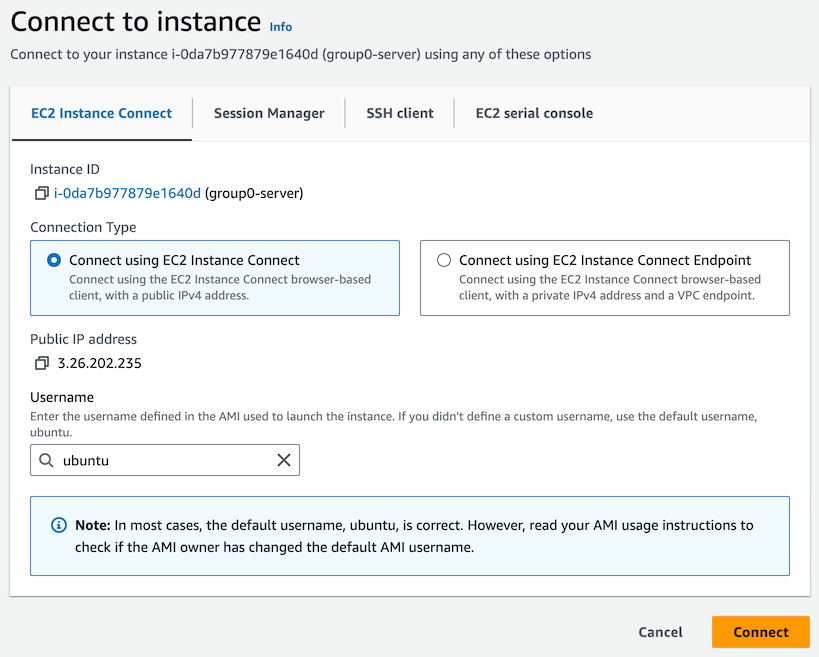
Click the “Connect” button, and you should be logged in, with a prompt like this:
ubuntu@ip-172-31-42-249:~$ (The actual IP address you see will be different; this is the internal private IP address of the instance)
This command line is called the “shell”, where you can type Linux commands. You are logged in as the user ubuntu.
Type sudo -s to get a root shell, which gives you full permissions. The prompt should change:
ubuntu@ip-172-31-42-249:~$ sudo -s
root@ip-172-31-42-249:/home/ubuntu#
Now type the following commands:
apt update
apt install apache2
If you see a prompt “Do you want to continue?”, type “y” and hit Enter.
To test your webserver, you need to find your instance’s public IP address. You can get via the AWS console, or you can type at the shell prompt:
curl ip4.me/api/The response will contain the public IP in the second column:
IPv4,3.26.202.235,v1.1,,,See http://ip6.me/docs/ for api documentation
     ^^^^^^^^^^^^
Once you know the public IP address, everyone in the group can open a new tab within their laptop’s web browser, and type in the IP address as a URL, for example:
http://3.26.202.235/You should see an Ubuntu Apache2 Default Page saying “It works!”
You can customize this web page. Back at the Linux root shell, open a text editor:
nano /var/www/html/index.htmlUsing Page Down, scroll down past the stylesheet data until you find the <body> tag, after which you will see:
        <div>
          <span style="margin-top: 1.5em;" class="floating_element">
            Apache2 Default Page
          </span>
        </div>
        <div class="banner">
          <div id="about"></div>
          It works!
        </div>
Edit it: for example, change the string “It works!” to “Welcome to group X webserver!”
After making your changes, to exit and save:
Since you no longer need to be root, type “exit”. This will return you to the login shell for the ubuntu user.
For this section, a DIFFERENT person in your group should perform these steps, while the others watch
In this section, you’re going to learn how to interact with the AWS API using a command line tool.
Just as the first person in your group did before, you need to use EC2 Instance Connect to get a shell on your instance.
You should be logged in with a shell prompt:
ubuntu@ip-172-31-42-249:~$ This time, don’t start a root shell.
Now enter the following commands to install version 2 of the aws cli tool. Copy-paste each line to ensure they are accurate.
sudo apt install -y unzip
curl https://awscli.amazonaws.com/awscli-exe-linux-x86_64.zip -o awscliv2.zip
unzip awscliv2.zip
sudo ./aws/install
(The “unzip” step scrolls a large number of filenames to the screen, and can take a minute or two)
If you get a warning about “Pending kernel upgrade”, just hit Enter to select
<Ok>If you get a warning about “Daemons using outdated libraries”, hit Tab to select
<Ok>, then hit Enter
You should be back at the shell prompt. Type the following commands to check that it has installed successfully:
aws --version
aws help
The help command gives detailed information about the options available. You don’t need to read it, but hit Space to get to the next page. Then hit “q” to quit. (Other Linux commands can usually be stopped using Ctrl+C)
Warning: do not use Ctrl+Z to stop a Linux command. If you do, the command is suspended but remains in memory, waiting to be restarted. If you do this by accident, type
fgat the shell to bring it back into the (f)ore(g)round.
“aws” is a command-line front-end to the AWS API, which you can use to control resources in the cloud.
Try running the following command:
aws iam get-userYou should see an error message:
Unable to locate credentials. You can configure credentials by running "aws configure".That’s because the tools doesn’t yet have any credentials to talk to the API. We can’t use our existing web console login, because username+password (or username+password+MFA) are not suitable for API logins.
For now, we are going to create an API key - which is the old way of allowing access, and very insecure.
Return to the browser tab where you have the AWS console open (that is, the AWS management interface). If you have lost it then login again.
At the top left corner, click on the “Services” button. Under “Recently visited” click “IAM”. If you don’t see this, then enter “IAM” in the search box.
You should be at the IAM Dashboard.
In the left menu, under “Acces Management”, click on “Users”.
Find your own username in the table of users, and click on it. You should get a page with “Summary” followed by various Permissions tabs.

Now click “Create access key”
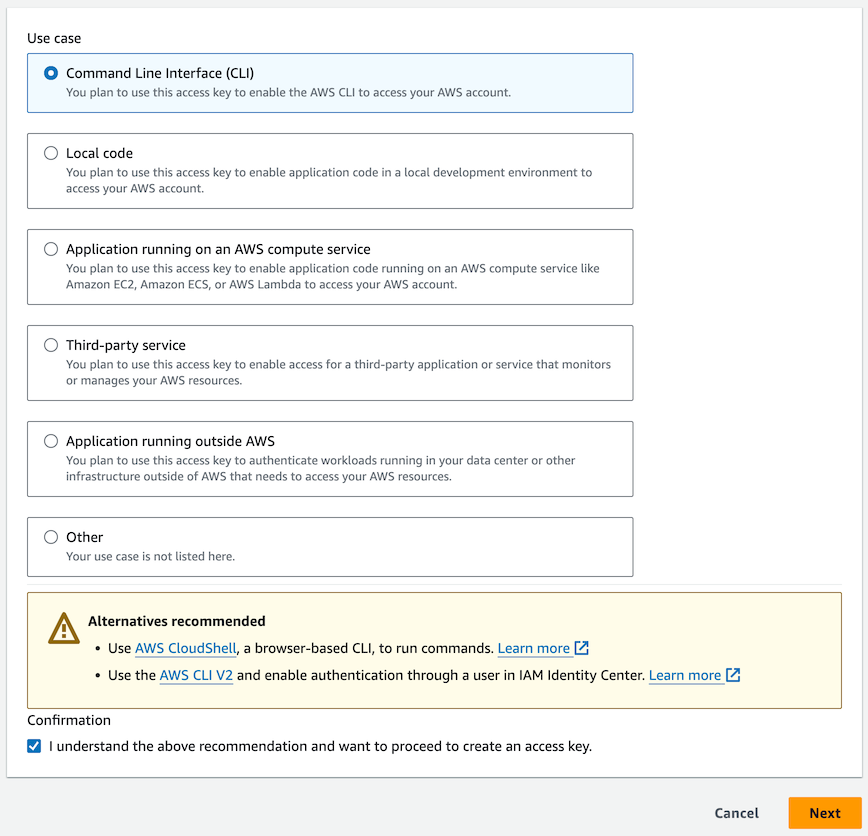
You should see a page of “Use cases”. Click the first one: “Command Line Interface (CLI)”
You’ll get a warning saying there are more secure ways of achieving what you want, but for now, check the box at the bottom that says you understand and wish to proceed anyway. Then click Next.
In the description, enter some text like “group0 awscli access”. This describes what you will use the key for. Then click “Create access key”.
The key comes in two parts (“Access key” and “Secret access key”), and you will need both of them:
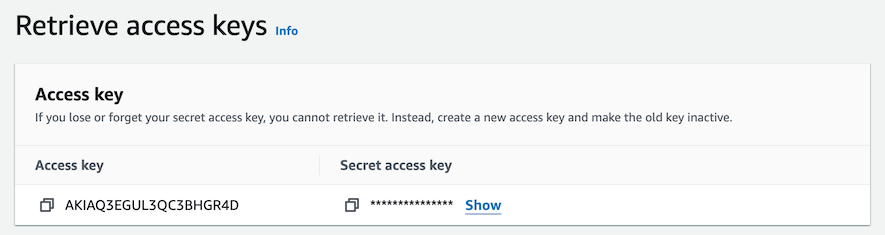
Click on “Show” to reveal the secret part. Then copy both parts into the clipboard and then into somewhere you can keep them safe, such as Notepad. Click the small squares icon for “Copy”.
The Access key can be seen later, but the Secret access key cannot. Hence you must save it now. If you lose it, you will have to regenerate a new access key.
Return to the Linux shell. Type the following commmand
aws configureYou will be prompted for several values, including both parts of your access key
AWS Acccess Key ID [None]:                  << Paste first part (access key)
AWS Secret Access Key [None]:               << Paste second part (secret access key)
Default region name [None]: ap-southeast-1  << Or whatever your instructors tell you
Default output format [None]:               << Leave blank, just hit Enter
These values are just stored in files on your filesystem. You can see them using these commands:
cat ~/.aws/config
cat ~/.aws/credentials
Now repeat the command you tried before:
aws iam get-userYou should get a response similar to this:
aws iam get-user
{
    "User": {
        "Path": "/",
        "UserName": "johnsmith",
        "UserId": "AIDAQ3EGUL3QB3KXYCLW3",
        "Arn": "arn:aws:iam::058264411872:user/johnsmith",
        "CreateDate": "2024-02-07T14:11:33Z",
        "PasswordLastUsed": "2024-02-07T14:31:15Z",
        "Tags": [
            {
                "Key": "AKIAQ3EGUL3QC3BHGR4D",
                "Value": "group0 awscli access"
            }
        ]
    }
}
The “Arn” (Amazon Resource Name) is a globally unique identifier for the resource (in this case, a user).
By default, the response is telling you information about the user who owns the API key that you’re using. But you can also obtain information about other users. Try fetching information about another person in your group (they will have to tell you their username):
aws iam get-user --user-name alicejonesTry listing all users:
aws iam list-usersNote that the responses you are getting are in JSON format, which is structured data, designed to be machine-readable.
There are other formats which are easier for humans to read: try these commands as well.
aws iam list-users --output text
aws iam list-users --output table
You can manage all AWS resources this way. To get details of EC2 instances:
# To list all instances:
aws ec2 describe-instances

# To search for an instance by its name:
aws ec2 describe-instances --filter Name=tag:Name,Values=groupX-server
When there is a large amount of output, a pager is used by default. Hit Space for next page, and “q” to quit.
Aside: can you see why this API key is so insecure? It allows anything that your user can do, which for you means full admin rights over the whole account! But an API key can be easily copied and used from anywhere.
If there are three people in your group, then the third person should do this section. Otherwise, one person should create the bucket and upload a file, and the other should use the aws command to retrieve it
S3 is a high-availability object storage system. By default, objects are stored within one region but replicated between multiple Availability Zones in that region.
Make sure you are logged into the AWS console.
Click on “Services” at the top-left corner, enter “S3” into the search box, and then click on S3. This will take you to the S3 dashboard:
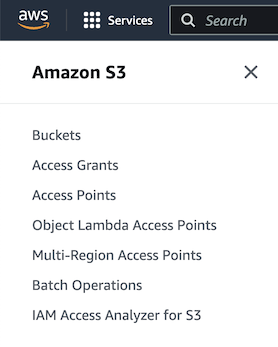
(If the sidebar has collapsed then there will be a hamburger, in which case click on it to expand)
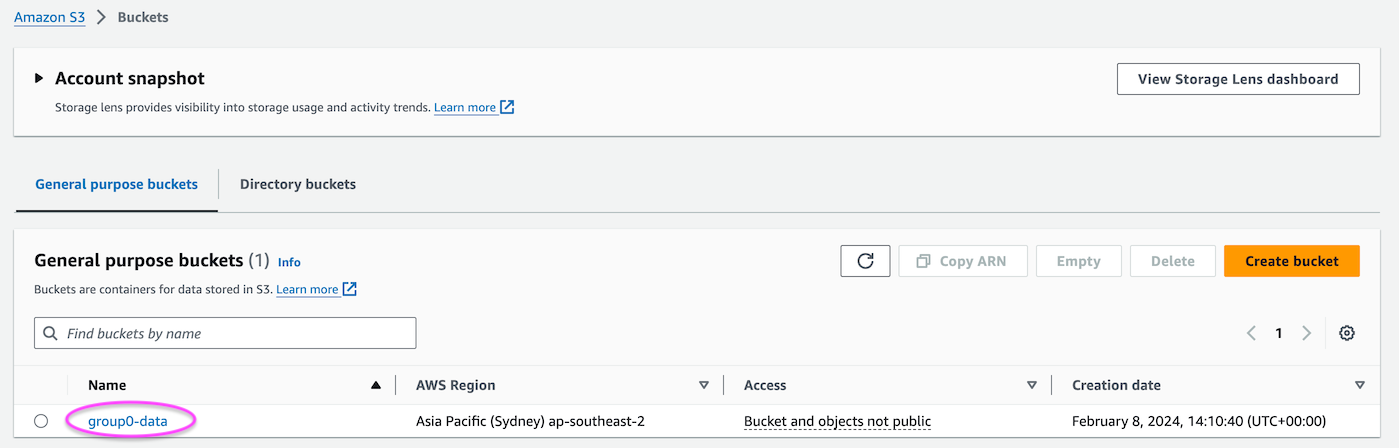
Click on “Buckets”. You should see a tab with “General purpose buckets” - then click on “Create bucket”
If the bucket name you have chosen is already taken, then modify it until it’s accepted. (All buckets share the same global namespace, even between different regions)
Find a file on your laptop that you want to upload: for example, create a small text file in Notepad and save it. Just ensure that it does not contain sensitive information.
In the bucket listing, click on the bucket name:
Then in the next page, click the “Upload” button.
You can either drag and drop a file, or click “Add files” and select a file from your filesystem. Check the selection box next to the filename, and then click “Upload”.
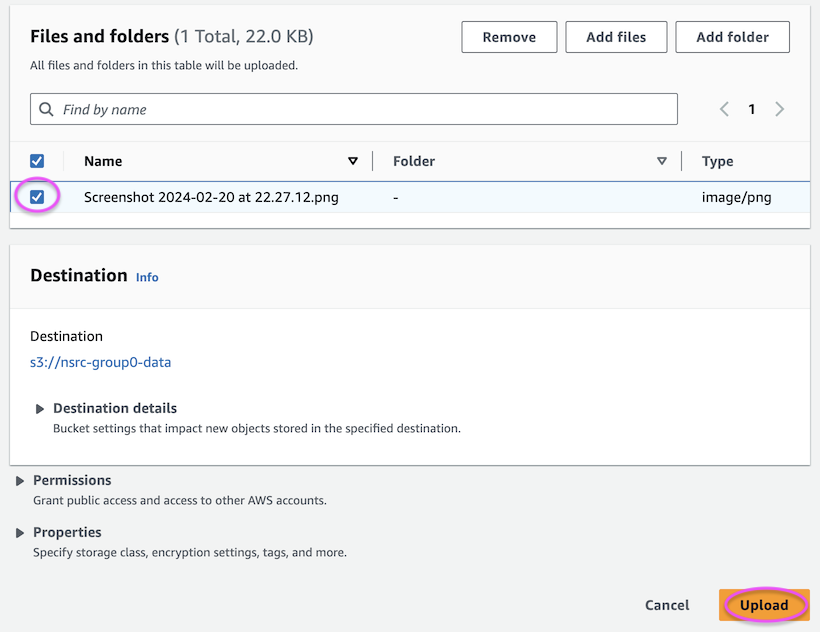
You will briefly see a progress bar, and then “Upload succeeded”
Now you will retrieve the file using the AWS cli, to simulate an application program retrieving a file via the S3 API.
Get to the Linux shell on your EC2 instance using EC2 Instance Connect, as described previously.
List the contents of the bucket:
aws s3 ls s3://nsrc-groupX-data(replace “nsrc-groupX-data” with the name of your bucket)
To retrieve the file:
aws s3 cp s3://nsrc-groupX-data/name-of-file.txt .

# If the filename contains spaces, you'll need to enclose it in quotation marks:
aws s3 cp 's3://nsrc-groupX-data/name of file.txt' .
(The dot by itself means “copy to the same name in this directory”)
Now check whether the file exists:
ls -lIf it’s a text file, you can type it to the screen:
cat name-of-file.txtYou can use aws s3 help, aws s3 cp help etc for more details on these commands.
These exercises are optional, but are provided in case you have spare time.
Suppose you want to grant someone on the Internet access to an object in S3. You definitely don’t want to give them your API key! In fact, even if you created a more restricted API key that only gave read access to your bucket, you would still not want to hand this out to strangers.
Instead, S3 provides a mechanism called “pre-signed URLs”. Run the following command in the Linux shell:
aws s3 presign s3://nsrc-groupX-data/name-of-file.txt --expires-in=900(correcting the s3 URL to match the one you used before for aws s3 cp)
This should spit out a long URL. Copy it, paste it into a fresh tab in your browser, and the file should appear in your browser.
This link is valid only for that one file, and only for a limited amount of time - in this case 900 seconds, which is 15 minutes. (The default, if you don’t specify it, is 1 hour)
Using this mechanism, a web application can grant a user the ability to download a file, by issuing them with a pre-signed URL, and then the user can download it directly from S3 without having to stream it via the web server.