
The instructors have set up some Proxmox VE servers for you to work on. You will be using only the “node1” servers for this exercise. Unless told otherwise:
cluster1-node1 is used by groups 1-6cluster2-node1 is used by groups 7-12cluster3-node1 is used by groups 13-18Each server will be in the state you’ll see after a fresh Proxmox install.
Please don’t use any nodes other than node1; they must be empty of VMs when we join them into the cluster later on
Work together in your assigned groups of two or three people. It’s fine that multiple groups are working on the same node.
Everyone can do this.
Start at http://www.ws.nsrc.org/, and use the drop-down menu to access the web interface for node1 in your assigned cluster.
Login using:
(PAM = Pluggable Authentication Modules; this means you are logging in using a Linux system account)
Ignore the message about “No valid subscription”, and click OK.
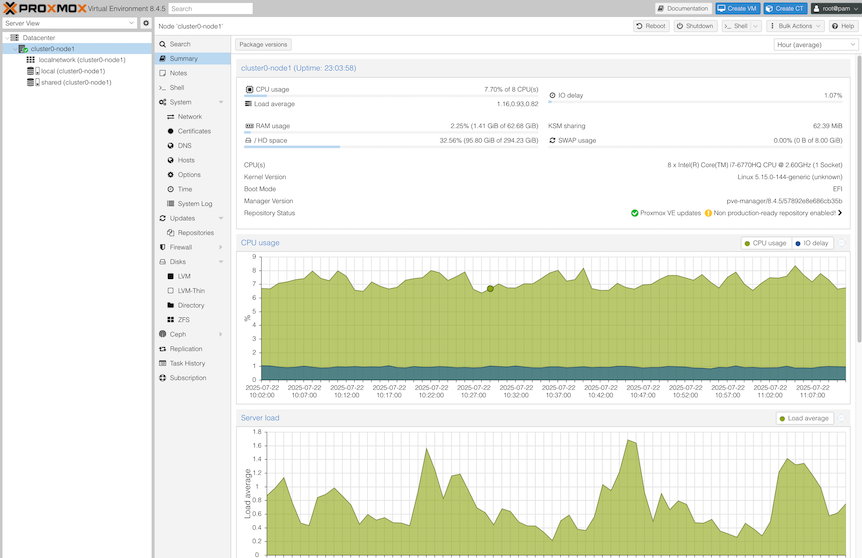
To check the overall status of Proxmox:
You should see you have no VMs and no containers.
To check server-level statistics:
You’re going to import a pre-built OS image into your node, use it to create a VM template, which will allow you to launch ready-to-run VMs configured with cloud-init. This gives a cloud-like experience on Proxmox, making it very quick and easy to launch new VMs.
This example uses the Ubuntu cloud image published by Canonical, but the same process should work for many other cloud images.
For this part, ONE person is going to do this for the whole cluster. So, groups 1-6 should nominate one person and gather around their laptop; groups 7-12 choose another person, and so on.
This part of the exercise uses the Unix command line (shell), partly for speed, and partly because there’s one step which can’t be done in the GUI.
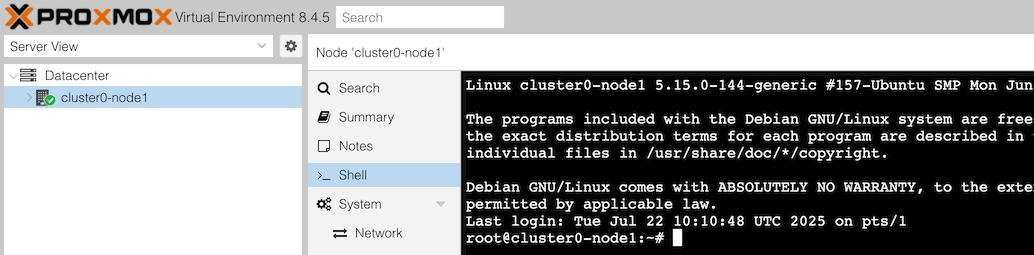
The person doing this step needs to get a Unix shell on
clusterX-node1. Do this in the Proxmox web UI by selecting
clusterX-node1 in the left-hand menu, then clicking
>_ Shell in the next column.
Remember, only ONE person is doing the following steps on behalf of all the groups sharing clusterX-node1 !
Step 1: start by creating a VM with no disk.
Proxmox normally assigns VM IDs starting from 100, but here we’re going to choose a high number 9001, to make it clear this is a template.
Run the following command (you can use copy-paste!)
qm create 9001 --memory 1024 --net0 virtio,bridge=vmbr0 --scsihw virtio-scsi-pciIf you get any error, ask for help.
Step 2: add a SCSI disk. The instructors should have already downloaded a suitable image, so you can add a drive and import it from the image at the same time (this is the one step which doesn’t appear to be possible through the GUI)
qm set 9001 --scsi0 local:0,import-from=/shared/private/noble-server-cloudimg-amd64.img(In local:0, local is the storage pool and
0 is the disk number on this VM)
You will see some “transferred” notifications as the disk is created, ending with:
scsi0: successfully created disk 'local:9001/vm-9001-disk-0.raw,size=3584M'
Step 3: set the VM to boot from this drive:
qm set 9001 --boot order=scsi0Step 4: Add a CD-ROM which will hold the cloud-init data used to configure the VM
qm set 9001 --ide2 local:cloudinitStep 5: (DON’T DO THIS: REFERENCE ONLY). Some cloud images require the VM to use a serial console. But the Ubuntu cloud image we’re using is fine with a normal VGA console, so you should skip this step.
### DON'T DO THIS:
### qm set 9001 --serial0 socket --vga serial0By now the VM will have appeared in the GUI automatically, but you can also inspect it from the command line:
qm config 9001The output should look something like this (the MAC address and uuids will be different)
boot: order=scsi0
ide2: local:9001/vm-9001-cloudinit.qcow2,media=cdrom
memory: 1024
meta: creation-qemu=9.2.0,ctime=1753180808
net0: virtio=BC:24:11:7C:D1:10,bridge=vmbr0
scsi0: local:9001/vm-9001-disk-0.raw,size=3584M
scsihw: virtio-scsi-pci
smbios1: uuid=ba409540-ee2a-46b1-a438-ef33099dcd75
vmgenid: d55c401c-e425-4ebb-9baa-878d8a3eb2b8
While you are here, you can look at exactly where Proxmox stores its local disk images:
ls -lRs /var/lib/vz/images/The flag -l means “long listing”, -R means
recurse into subdirectories, -h means human-readable
(e.g. GiB or MiB) and -s means to show the space allocated
to each file. An example response might look like this:
/var/lib/vz/images/9001:
total 1.8G
616K -rw-r----- 1 root root 4.4M Jul 24 19:23 vm-9001-cloudinit.qcow2
1.8G -r--r--r-- 1 root root 3.5G Jul 24 19:23 vm-9001-disk-0.raw
^^^^                        ^^^^              ^^^^^^^^^^^^^^^^^^
space used               file size                 file name
There are two files shown. The second one says its length is 3.5GiB, however only 1.8G of disk has has been allocated. This is a “sparse” or “thinly-provisioned” file. The remaining parts of the file are treated as being all zero data, and any writes to those areas will cause new blocks to be allocated.
Another way to find the disk space used by a file is using
du:
du /var/lib/vz/images/9001/vm-9001-disk-0.raw

# Or with "human readable" disk sizes shown:
du -h /var/lib/vz/images/9001/vm-9001-disk-0.rawSince 3.5G is not a lot of space for our VM to grow into, let’s enlarge it to 5GiB (= 5 x 1024 x 1024 x 1024 bytes):
qm disk resize 9001 scsi0 5368709120Repeat the command ls -lRs /var/lib/vz/images/ and you
should see the size is larger, but the number of allocated blocks is
unchanged.
Growing a cloud image before it gets booted for the first time makes life easy, because cloud-init will sort out updating the partition table and growing the root filesystem to fit the available space.
Growing a block device after boot can be done with extra steps. However, shrinking one needs a great deal of care. You need to shrink the filesystem inside it first, or else you’ll lose all your data!
A different person in the cluster can do this step if you like
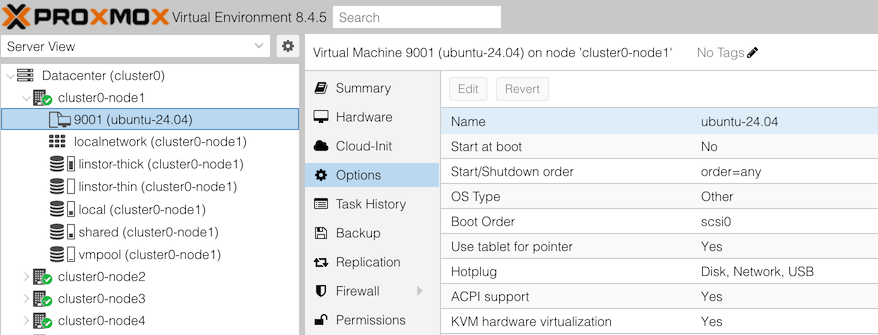
Log into the Proxmox web interface, and find the VM you’ve just created, in the left-hand column: it will be underneath clusterX-node1, with the numeric ID 9001 (you didn’t give it a name yet)
Click on VM 9001 in the left-hand column - but don’t start it!! Instead, select “More > Convert to Template” near the top right corner, and click Yes to agree. This step can’t be reversed.
Now assign a name to your template. With the VM still selected in the first column, click on “Options” in the second column (it’s under Cloud-Init), double click Name, and enter a name like “ubuntu-24.04”
At this point, break up back into your groups of two or three people. Each group is going to launch their own VM on this node, and use it to create a web server.
Select one person in your group to do the steps here, while the other person makes the instructions visible in their laptop.
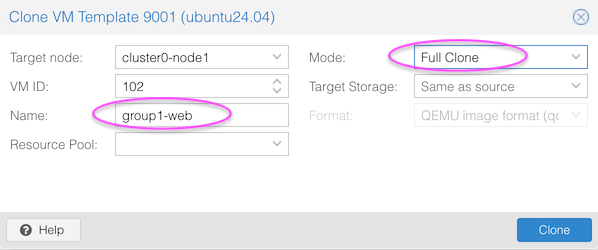
The person doing the steps needs to open Proxmox web interface for clusterX-node1, and click on the VM template 9001 in the left-hand panel. They may first need to click the arrow next to clusterX-node1 to expand it.
At the top right, select More > Clone and you will get a cloning page.
Then click Clone.
You’re now nearly ready to start the VM. However if you start it now, it won’t have any password set (or any other login method like SSH keys), so you won’t be able to login to it.
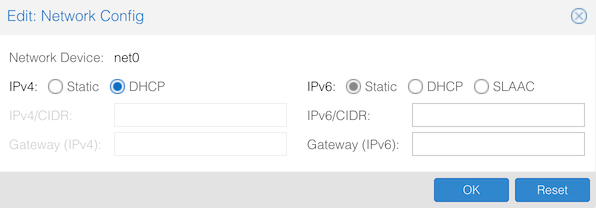
Click on your newly-created VM in the left-column (make sure template 9001 is NOT selected!) Then click on Cloud-Init in the second column (underneath “Hardware”).
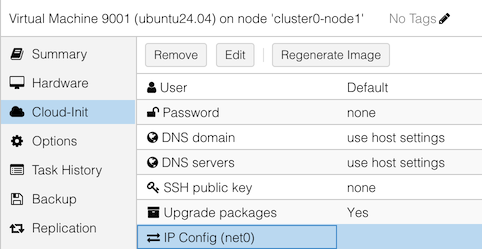
Now:
Note: you could have set credentials on the template, if you want the same defaults for all VMs you clone from it. You can still override them for each VM.
In the real world you would probably also want to increase the disk size further before booting the VM. For the sake of this lab, leaving it at 5GiB is fine.
Now click on the “Console” button in the second column (above “Hardware”), and click the “Start Now” button in the middle.
There is also a “Console” button above the VM, but this will open the console in a new window.
Your VM should boot into Ubuntu Server.
Login with username “ubuntu” and the password that you configured into cloud-init.
Choose who in your group you want to do this section
Because of limited disk space in this lab VM, we’re going to disable automatic updates (you would not normally do this in a production system)
From your VM’s console window, after logging in, enter the following commands (copy and paste won’t work here):
sudo dpkg-reconfigure unattended-upgradesWhen it says “Automatically download and install stable updates?”,
hit Tab to highlight <No> and hit Enter.
Continue with the following commands to install apache2:
sudo apt update
sudo apt install apache2
# answer "y" when asked if you want to continue
Clean the cache of downloaded packages to save some disk space:
sudo apt cleanFind out your VM’s IP address as follows:
ip addr listLook for a line like this:
    altname enp0s18
    inet 100.64.2.70/22 metric 100 brd 100.64.3.255 scope global dynamic eth0
         ^^^^^^^^^^^
Then enter that IP address into your web browser, to view your website. It should show “Apache2 Default Page”.
You have a working web server!
If you want to change the content of the page, inside the VM edit
/var/www/html/index.html (using a text editor like
nano or vi), save it, then refresh the page in
the web browser.
Once you’ve finished, shutdown your VM by clicking on the Shutdown button. If you click on the arrow to the right, you’ll see there are several options:
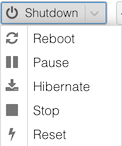
The difference between “Shutdown” and “Stop” is that “Shutdown” signals to the VM to shut itself down cleanly, whereas “Stop” terminates it instantly. Like pulling out the power cord on a server, “Stop” risks filesystem corruption - you should only do it if it won’t shut down properly, or you’re about to delete the VM anyway.
This is an optional exercise in case you have spare time available, or to do in break time.
This demonstrates some of the GUI capabilities of Proxmox to install a VM in the “traditional” way, by booting a VM with an ISO (CD) image and a graphical console.
Go to Datacenter (first column), Storage (second column). There
should be an entry called “shared”, and under the column “Path/Target”
is shows /shared. The instructors have shared one or more
ISO images in this directory, including AntiX, a small Linux
distribution.
Click the blue “create VM” at top right (not “create CT”)
Under “General”:
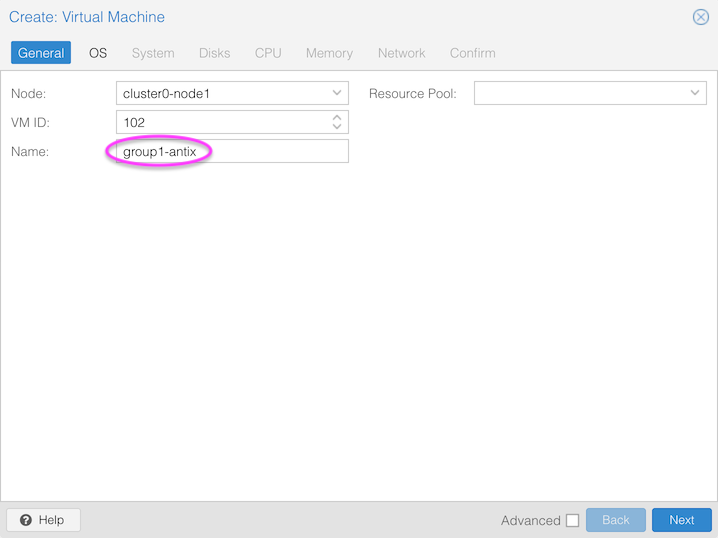
Under “OS”:
antiX-23_x64-base.iso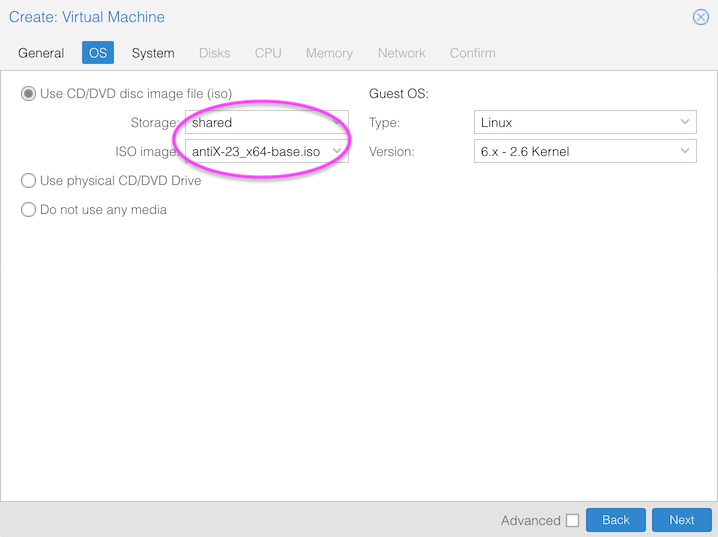
For the next pages:
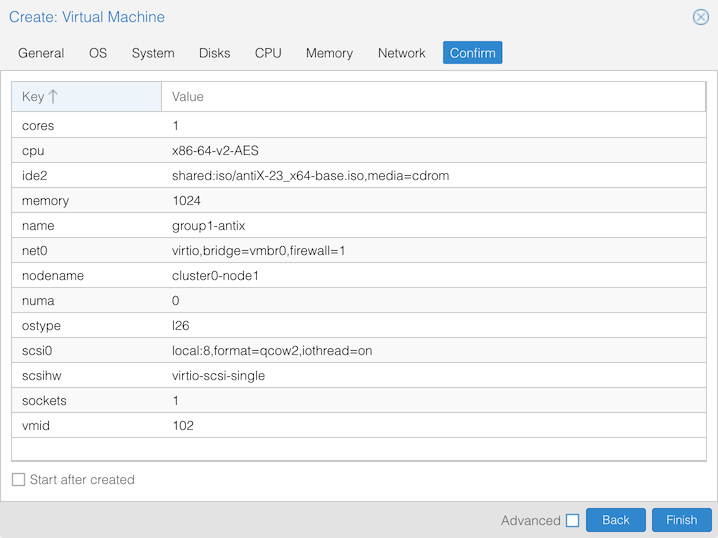
Clicking “Next” again should give you the “Confirm” page, and then click “Finish”.
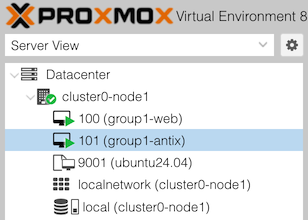
To find the VM you have created, if necessary expand your host in the left-hand list by double-clicking on it, or clicking the arrow next to it. Then click on your VM.
In the second column, click on “Summary” if it’s not already
selected. The right-hand pane will show information about your virtual
machine. Then in the second column click on >_ Console.
When you see “Guest not running”, click “Start now”.
Alternatively, there’s a “Start” button at the top of the screen, and a
>_ Consolebutton further to the right. If you use that, then it will open the console in a different window.
At this point, it’s just like doing an installation on a PC. You should get a splash screen; select the first option labelled something like “antiX-23 x64-base” to continue.
When at the AntiX desktop, you can double-click on the installer and follow its prompts.
When you reboot and are asked to remove the CD-ROM, go to the Hardware tab and double-click on CD/DVD Drive. Change the selection to “Do not use any media” and click OK. Then return to the console.
When your VM reboots, it should be running from its instance disk.
For more info on using cloud images with Proxmox, see the Proxmox documentation on Cloud-Init Support, the pve qm command, and this blog post
To remove the subscription nag message when you login to the web interface, see the script tools/pve/post-pve-install.sh from the github.com/community-scripts/ProxmoxVE repository.